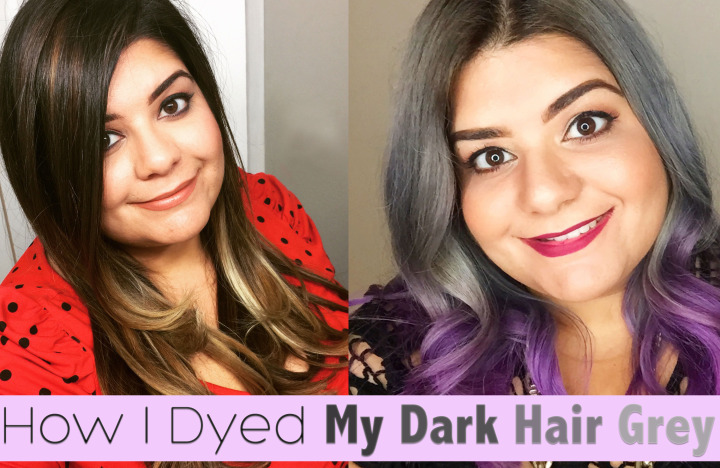
I was committed to my long brunette locks for many years, but I’ve been itching for some color in my life. I was looking for adventure far beyond my sun-kissed balayage and the few pops of purple hair I had last year. I wanted a standout look so I took to Google to figure out how to dye hair grey.
My transition to my grey hair started with a lot of research. I looked for ideas on Pinterest and pinned all of my ideas before I decided to take the plunge into the word of alternative hair colors. Finding the right color for me was the easy part, but stripping my hair from dark brown to platinum blonde without damage was my biggest concern and challenge.
How to Dye Hair Grey
Before I continue, you should know a few things:
- My hair was pretty much virgin hair, with the exception of some previous balayage on my ends.
- I hair was very long hair and down past the middle of my back.
- Both of the stylist who worked on my hair are professionals.
- I’m not a professional, but growing up with my mom as a hair stylist has taught me a thing or two.
- I didn’t do anything to prepare my hair for this transition, with the exception of trying to avoid heat on my hair a few weeks before the process started.
How To Dye Hair Grey: Stripping dark hair light enough to be colored grey
Stripping, bleaching, whatever you would like to call the procedure that removes the color from your hair is the most damaging color process. I had heard a lot about Olaplex, a professional product designed to protect hair from the damage that hair endures during this process. A lot of people on Instagram talk about Olaplex, such as Guy Tang and Aura Colorist, so I wanted to use this product to help in the lightening of my hair. My mom is a professional stylist, but had never worked with this product. She was also skeptical about some of the things that I showed her online, but I convinced her to use it anyways. So, she picked up some Olaplex from the beauty supply and we headed to the salon.
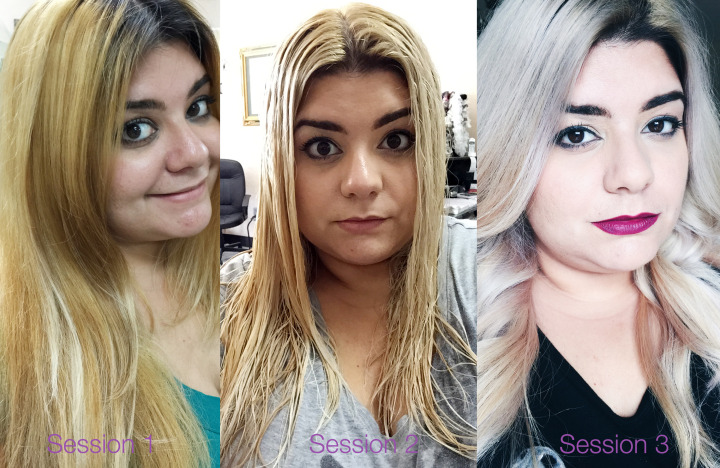
Before I started this process, I knew that it was going to take a few sessions to get my hair light enough to pick up the color. The first lightning session went well and within an hour my mom was able to lift me to a quite a bit with the help of Olaplex.
The result: A brassy golden blonde, but not too shabby for only one session. I wanted to go lighter, but my mom didn’t want to over do it, so she ran toner through it to get me to my next session. She also trimmed my ends because they needed a little dusting, but it terms of damage my hair felt good. When I left the salon we decided to do the next round of bleach in a month.
Round 2 of Bleaching
Well, I’m not a patient person, so I forced my mom to bleach my hair again a week later. Yes, that’s 4 weeks earlier than we had planned because I’m a very persuasive person. I figured if people on YouTube could go from brown to blonde in one day, so could I. I also figured that one week was plenty of time for my hair to relax. Things went so well during the first round of the process, that I was sure I could be platinum blonde by the end of this process, without sacrificing the integrity of my hair.

My mom bleached my hair again and 30 minutes into the process we ran into a bump. My mom noticed that my hair wasn’t lifting evenly, which meant that certain sections were going to need more processing. I didn’t like how it looked when she rinsed my hair because it was way too yellow and when it comes to grey, you have to get rid of the yellow before you can color it. My mom wanted to give my hair a break, but I basically forced her to process my hair again. That’s two bleaching sessions back to back.
Disclaimer: My mom and the bottle Olaplex both warned that the product isn’t a magic wand, but I wanted those “as seen on Instagram” results.
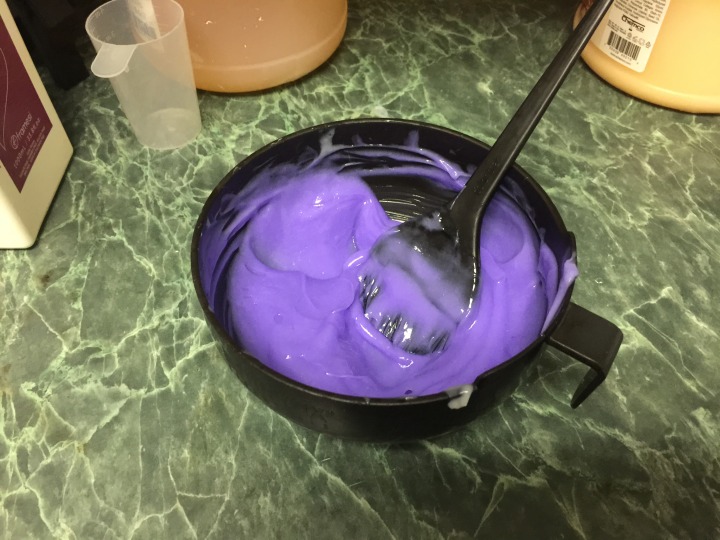
By the end of the third round of bleach, my hair was very light. I would say it was a pale yellow for the most part. To finish removing the yellow tones from my hair, my mom used a violet toner, which counteracts the yellow. When it was all said and done, I finally had platinum blonde hair!
I was so excited about the color and couldn’t resist running my hands through my hair, until my fingers got stuck that is. My hair felt dry, especially mid-shaft. As the days passed, I noticed a lot of my hair was falling off, but thank God that I have a ton of hair. I had no one to blame for the damage but myself, so I knew I needed to fix it before coloring my hair grey.
To repair my hair, I had to give up 2 things for a few weeks:
- No heat (bye-bye blow dryer!)
- No washing
My hair was in desperate need of moisture, so I started to load it with coconut oil. I love coconut oil and I made up my own coconut oil repair regimen to fix my hair. I literally lathered my hair in coconut oil for 3 days and on the final day I added olive oil and Aragon oil to the mix. All of these oils have the ability to penetrate the hair cortex to revive the moisture in each strand, which makes the hair stronger and healthier.
When it was finally time to wash my hair I used the Redken Frizz Dismiss shampoo and conditioner. These products are designed to fight frizz. They are also sulfate-free, which means they won’t strip the color out of your hair.
After just one repetition of my crazy coconut repair ritual my hair was pretty much back to normal. It was manageable and looked so much healthier.
Final Step: Going grey…and purple!
For the actual Grey coloring of my hair I contacted Vanessa Workman, a local stylist that specializes on alternative hair colors. Most importantly, she’s a pro when it comes to grey hair, which can be super tricky to achieve. This is the most important thing to keep in mind when dying your hair grey or any other unnatural color. All stylist specialize in something, so make sure that your stylist is familiar with this process before going to someone. In case your wondering, my mom was totally cool with me going to Vanessa to finish my look. My mom isn’t into unicorn hair, but new friend Vanessa is a pro at it!
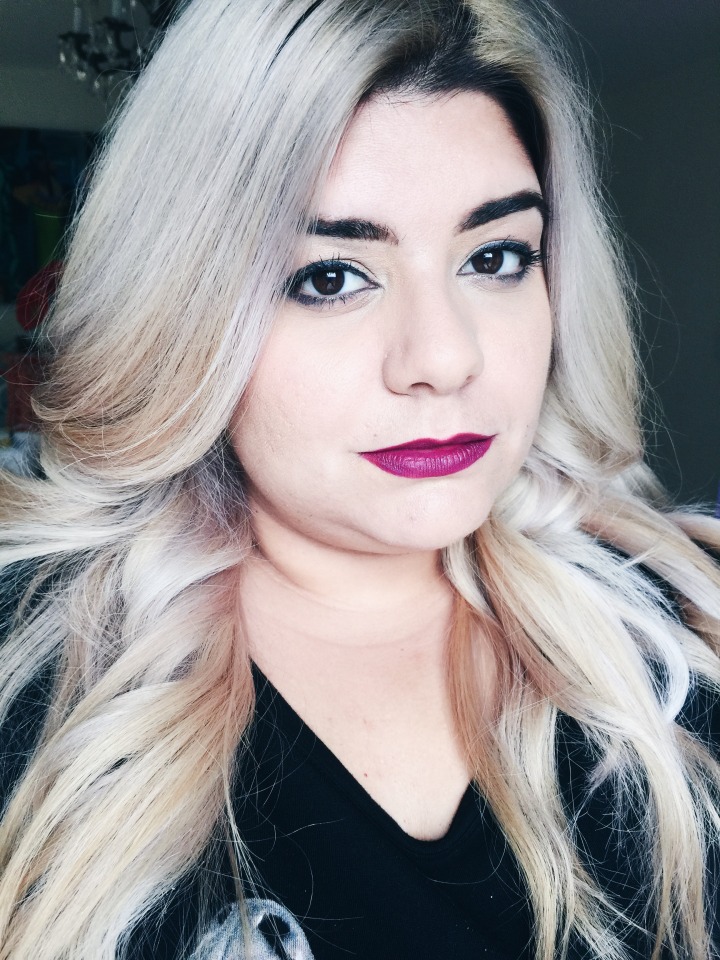
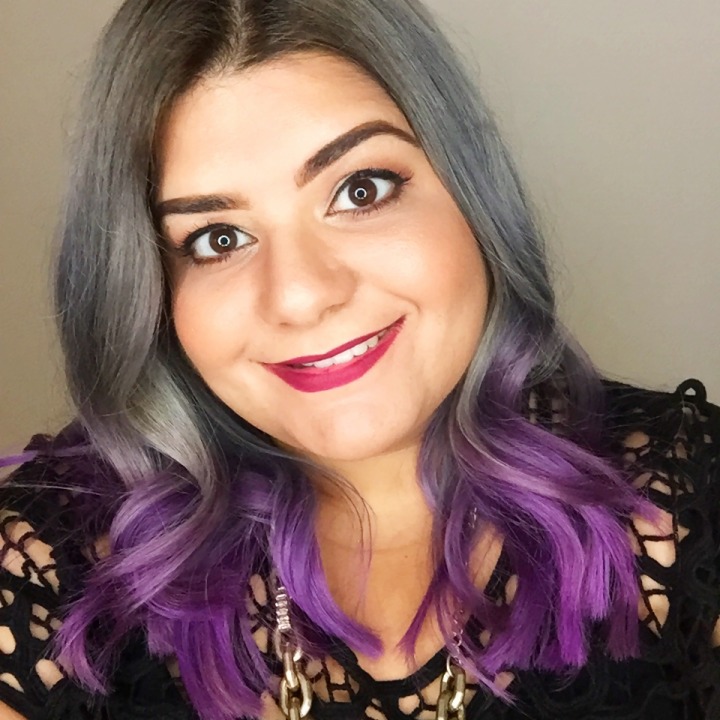
Initially I had planned to go all grey, but after I had a chat with Vanessa, we decided to do a grey to purple ombré, which I recently found out is called smokestack hair. I was torn between the two colors and couldn’t pick one, so I decided to give them both a shot! Vanessa whipped up her color concoctions and worked her skills on my strands. Long story short, she was able to give me a look that would give me the best of both smokey worlds on the color wheel.
While I was there I also decided to try to a new cut. I wasn’t planning on this, but I really wanted my new look to be chic and I felt that it would be best if I got rid of some of the damage from the previous processing. My hair wasn’t in terrible conditions, but I did have some frazzled ends, which Vanessa chopped off. I ended up with a chic long lob. I’m not going to lie, I was having major anxiety the first few days, but now I’m so happy that I lobbed it up!
I love the finished result of my hair, but it was definitely a learning experience. If this this something you are thing about doing, I advise you to do your research and seek a professional stylist to help you with your transition. With that being said, prepare to spend some bucks on this because it’s not a low maintenance look. Speaking for myself, I can plan to be sitting in Vanessa’s chair every 4-6 weeks for touch ups. I also advise you to be patient and be prepared to lose to length if you have dark hair and decide to embark on the (artificial) grey hair journey.
What do you think of the grey hair trend? Is this a process that you would consider to get the look?


I want to do this sooooooooo bad! Not the whole head, just the underneath part but not sure, if I can fully commit to it yet. I’m looking for extensions that I can try out for a bit to make sure that is what I positively want.
Did you know their is an app that you can use to test it out before you take the color plunge?
I JUST did this exact thing yesterday, but as I’m a mom of three kids under 6 I opted to do two back to back strippings in the same session (I’d never done more than balayage and constant temporary glosses). Ouch! My scalp is raw and tender and my hair has that same mid-Strand roughness. Can you elaborate you coconut oil method? Did you slather it on and just leave it for three days?? I do have a lot of wide headbands and bandanas, but that seems…greasy lol.
I ADORE the purple dip dye you added. After four hours away from my kids my husband was in meltdown hah so I didn’t have time for anything else and now I definitely have some brassy green-tinged bits underneath where my hair is darkest. I just texted my stylist to see if I could add this in myself before my touch up in 6 weeks!
Hello LeeAnn. I’m sorry to hear about the tenderness and roughness. Unfortunately it’s one of the downfalls of bleaching. In terms of my coconut oil method, I by virgin coconut oil from Trader Joe’s and I scoop out a spoonful and apply it to my hair. I literally soak my hair from the mid shaft to the ends. I suggest you leave it on as long as possible by wearing a shower cap over it. Good luck!