Disclosure: Collective Bias, Inc. and its advertiser have compensated this shop. All opinions are mine alone.
#ProjectAmazing #CollectiveBias
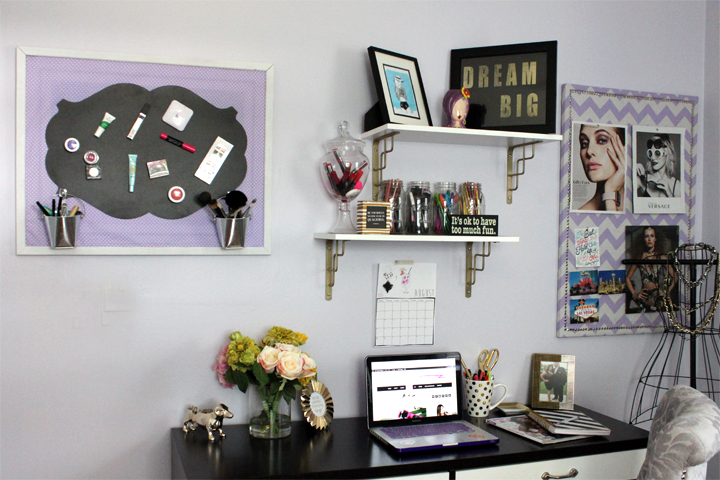
A little over a year ago, my boyfriend and I took the leap and bought our first house together. We both had different things on our wish list, but the most important thing on my list was an extra room that I could use as an office/blogging/craft room. This wasn’t a want for me, it was an absolute must and thankfully I got the space that I was dreaming for!
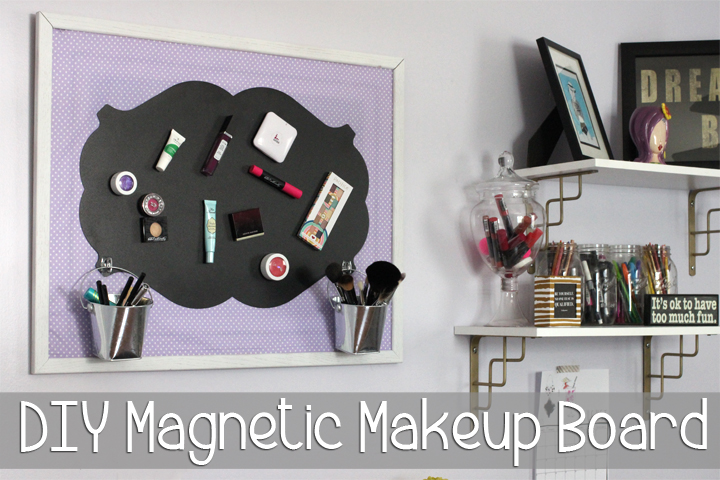
Fast forward a year and I’ve finally got the room in order, but I’m still working on small details and organizing my space. Since I use this as an office and an area to do my makeup (and video tutorials), I usually find random cosmetics products lying on every table. Needless to say I’m tired of the mess, so I made a cute DIY Magnetic Makeup Board to help me keep the area tidy. My makeup board was easy to make and I was also able to up cycle an old picture frame that was left behind by the last owner of my house.
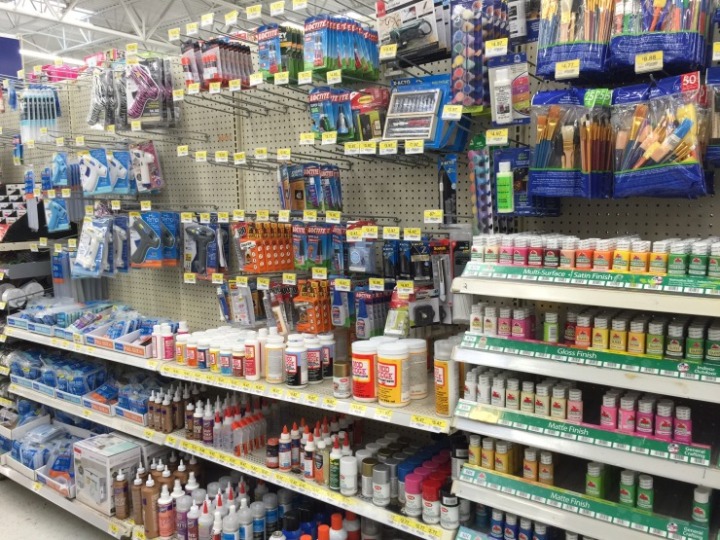
To make my DIY Magnetic Makeup board I headed to Walmart since they have a large crafting section that carries many of the products that I would need to create my DIY Magnetic Makeup Board. The craft aisle is a crafter’s paradise where Walmart has a wide selection of Command™ and Scotch® Brand products, together in one easy to find location in the store.
I will be using Command™ and Scotch® Brand for this craft because they have many type of items to chose from, fit for every task. Command™ in particular has items that are easy to remove (like the Command™ Picture Hanging Strips and Command™ Mini Hooks), so if I make a mistake in the process or decide to remove/change my magnetic makeup board in anyway, I don’t have to worry about damaging the whole board or the paint of my freshly painted walls.
DIY Magnetic Makeup Board
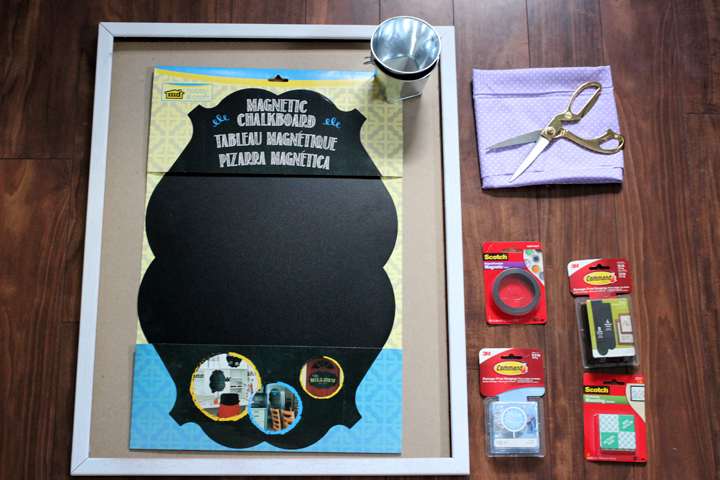
Supplies Needed:
- Picture Frame
- A piece of heavy cardboard to fit inside of your frame (I used the old picture/poster backing that was in the frame)
- A piece of fabric large enough to cover the cardboard
- Magnetic Chalkboard Board
- Command™ Picture Hanging Strips
- Scotch® Brand Permanent Mounting Squares
- Command™ Mini Hooks
- Mini buckets
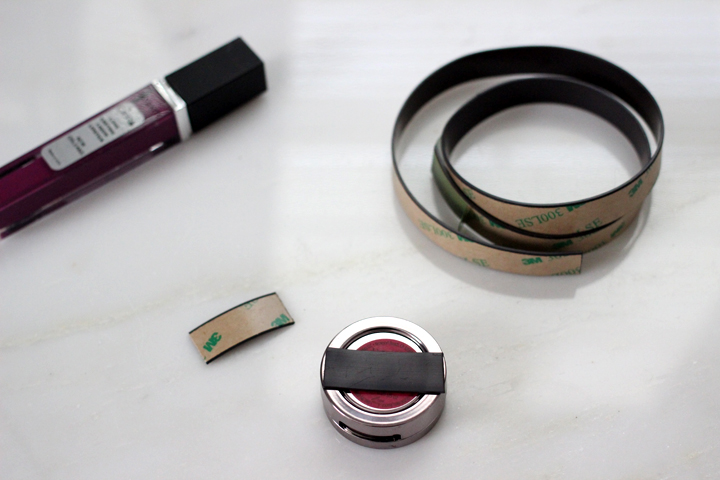
- Scotch® Brand Repositionable Magnetic Tape
- Scissors
- Pencil
Steps:
1. If the cardboard is inside of the frame, remove it. If you purchased your cardboard separately, cut the cardboard to fit the frame.
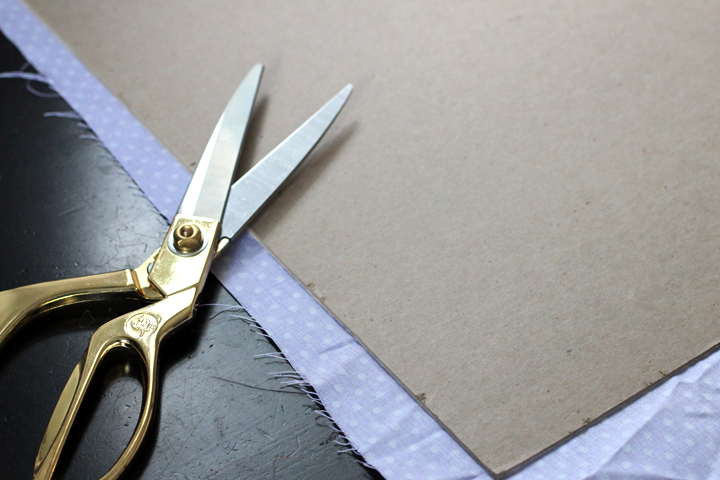
2. Cut the piece of fabric to fit the cardboard with a 1-inch overlap so you can fold it over later.
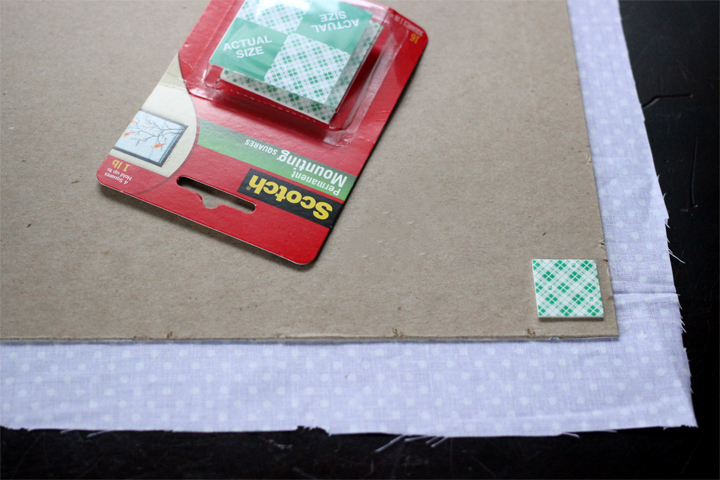
3. Place a full-sized Scotch® Brand Permanent Mounting Squares on each corner of the cardboard. Then cut pieces in half and then place a few more towards the center for additional support.
4. Stretch the fabric around the front (the decorative side) of the cardboard and secure it onto the Scotch® Brand Permanent Mounting Squares on the back. Make sure to pull the fabric tight so that it’s smooth on the front side.
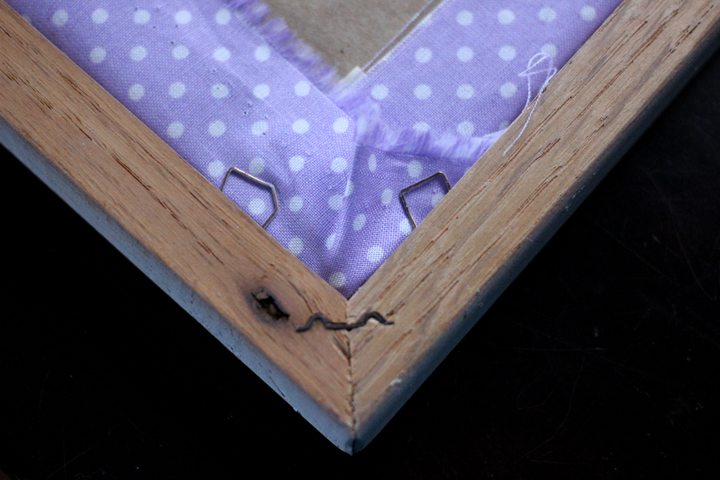
5. Fit the cardboard back into your fame and secure it. Most frames have locking tabs on the backside to hold in the cardboard, which I used and it worked perfectly.
6. Place the magnetic board fabric side up in the center of your frame and use a pencil to mark a few reference points where you are going to mount it. Make sure the markings are not visible on your fabric; it’s a good idea to mark an inch inside of the magnetic board.
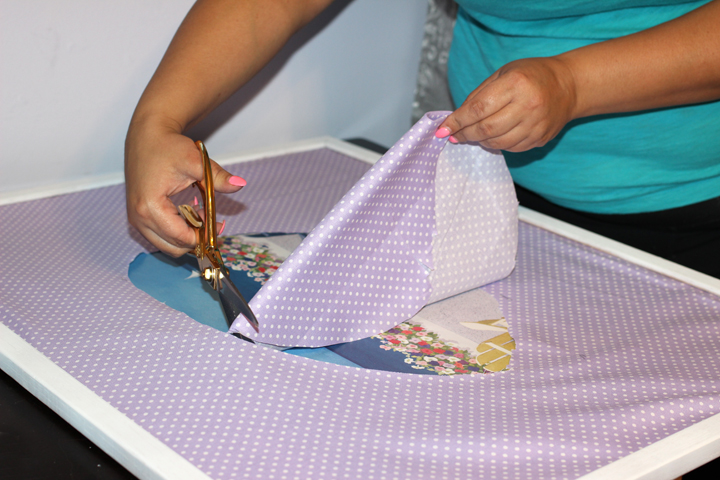
7. Cut out the fabric where you marked it, leaving an exposed area in the center of your cardboard. It’s important that the cut out area is not visible once you attach the magnetic board.
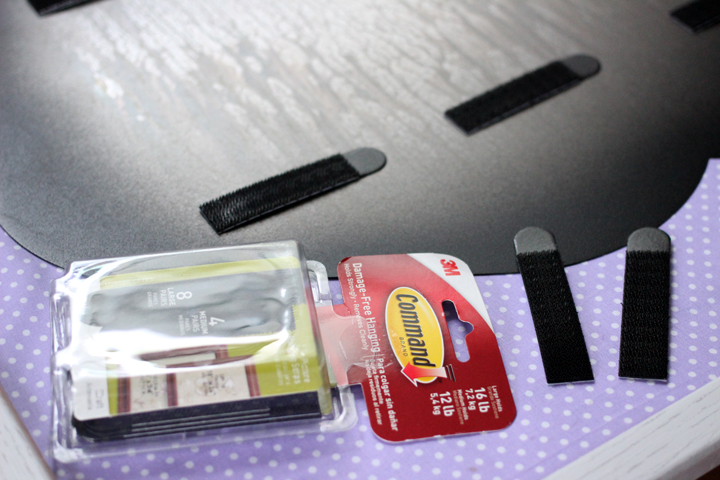
8. Attach several Command™ Picture Hanging Strips (as many as you need to support your magnetic board, I used 6) to the cardboard. Then, without removing the backing, attach the connecting half of the Command™ Picture Hanging Strips on top until you hear them click. When you have placed them all, you may remove the backing.
9. Make sure the magnetic board is free of dust and then carefully attach it to the Command™ Picture Hanging Strips on the frame and make sure that it’s secure.
10. Place Command™ Mini Hooks on the lower left and right corners of your magnetic board.
11. Hook your pails to the Command™ Mini Hooks.
12. Use the Command™ Picture Hanging Strips to mount your DIY Magnetic Makeup Board to your wall.
13. Cut and apply a strip of Scotch® Brand Repositionable Magnetic Tape to the back of each of the makeup products that you want to hang on your magnetic makeup board. For products that don’t have an even surface, layer on an extra piece of Scotch® Brand Repositionable Magnetic Tape.
I love my new DIY Magnetic Makeup Board because it’s helping me to keep my blogging room nice and organized. Now that it’s complete, I’m contemplating moving this board to my bedroom where I put my makeup on when I’m not doing something blogging related.
Are you creating any DIY’s using Command™ this summer? Take a look at all of these amazing summer project ideas and let me now which one you’re going to make! Share a link below of your finished project!


CUTE I did a DIY corkboard covering it with fabric. It was an ugly board that looks much better now. I’m jealous you have a whole room 🙂
I love to re-purpose things and give them life again. A lot of the things in my room have been uncycled.
Love it! This is a great idea for many different items 🙂 Cool!
Thank you! It can definitely be used to organize all kinds of stuff.